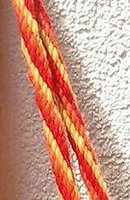
Here is what you need to make a round three coloured cord:
A circle:
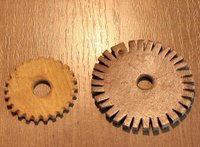
It can be made of wood, leather, stiff cardboard, even a cd. Make many cut-outs around the edge to secure the yarn.
Three pairs of different colour pieces of yarns - the length depends on the desired length of the cord, but keep in mind that for a 1 m cord you'll need three pairs of yarn pieces about 2,2 m long each.
Although the instructions may seem to be complicated at the first glance, the technique is very easy! ^^
Setting up:

Fold each piece of yarn in half. Place the pairs of yarn pieces across the circle, the same colour next to each other, leaving at least one free slot between the colours (to manipulate the yarn).
I numbered the first yarns we are going to work with for clarity.
Always start with the colour that is on the very bottom underneath the other colours (this advice helps when you have to put away the circle for a moment, and then you want to continue the job).
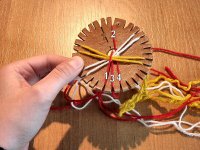
Take yarn end nr 1 from the top and put it in the slot at the bottom, next to yarn end nr 3.
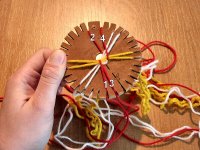
Now, take the yarn end nr 4 from the bottom and put it in the top slot next to yarn end nr 2.
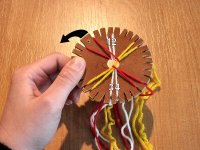
Turn the circle a bit counter-clockwise, so the red yarns are now on the left side. Tigthen the cord a bit, pulling all the yarns.
Now, we are going to work with white yarns.
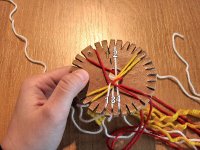
Follow the same steps as with red yarns: take yarn end nr 1 from the top and put it into the bottom slot next to yarn end nr 3.
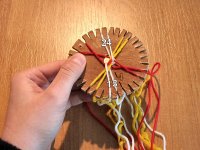
Now, take the yarn end nr 4 from the bottom and put it into the top slot next to yarn end nr 2.
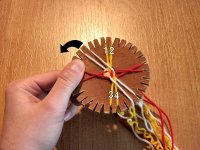
Turn the circle a bit counter-clockwise, so the white yarns are now on the left side, with red yarns beneath them. Tigthen the cord a bit, pulling all the yarns.
Now, we are going to work with yellow yarns.
ect., ect...
The result can be seen after several turns, when your cord appears through the hole in a circle, at the bottom. ^^
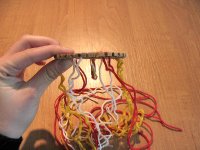
Another tutorial here: Kumihimo. Looks, like simple crafts can be very international! ^^

No comments:
Post a Comment